In this tutorial you will learn how to use MicroPython with a ESP32 microcontroller development board. These instructions will help you get started developing on Arduino 32-bit boards using Python. First we will download the software required to start developing on an ESP32 microcontroller. Then we will flash new firmware on the ESP32 board. Finally we will write a program to confirm all software was successfully installed on the ESP32 board.
In future tutorials we will use microcontrollers to interact with different crypto currencies (Bitcoin and Ethereum). The goal of these projects is to bridge IoT (internet of things) and the blockchain.
ESP32 microcontroller development board
We will be using an ESP32 microcontroller development board. Microcontrollers are also known as Arduino development boards. The predecessor of the ESP32 is the ESP8266. The ESP32 board:
- Has a dual core 32-bit microprocessor
- Supports Wifi and blue tooth
- Contains internal memory
- Contains flash memory
- Built-in Peripherals
For more detailed specifications for the ESP32 board visit Espressif or esp32.net. To buy an ESP32 board use one of the links below.
Software to download
To develop software on your ESP32 board you need; MicroPython, an integrated development environment (IDE), drivers and a few plugins. To start developing in MicroPython follow the steps below to download the required software.
1. Download the Thonny Python IDE at Thonny Python. This IDE is one of the best beginner friendly packages available for writing MicroPython code. The Thonny IDE is used for:
- Flashing new firmware
- Python development
- Erase the flash on a ESP32 controller.
2. Download and run the Thonny application.
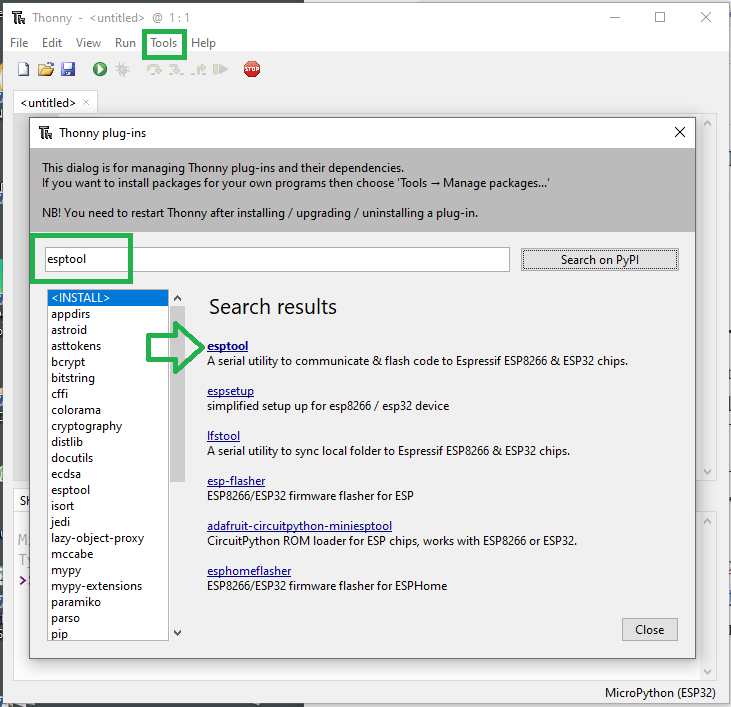
3. Next go to the Thonny tools menu and install esptool. esptool is required plugin to flash code to an ESP32 chip.
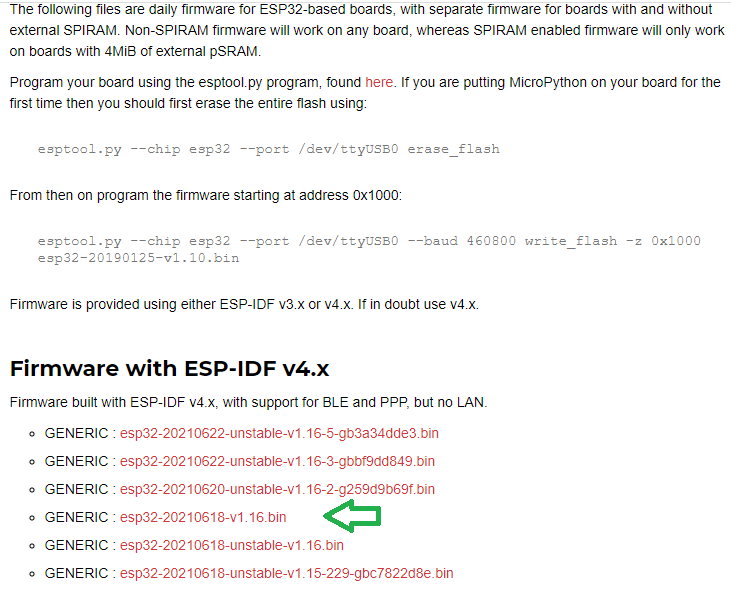
3. Next visit MicroPython.org and download the lasted ESP32 firmware. On the download page select the ESP32 chip section. Download and install the most recent stable version of the firmware. Unstable versions of MicroPython are labeled in the download list and should not be downloaded for this initiative.
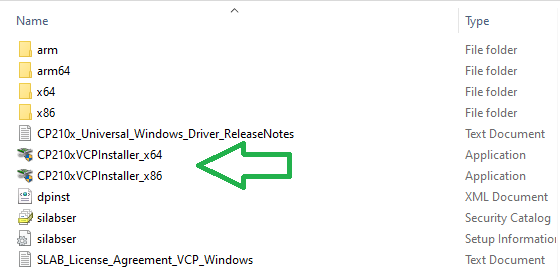
4. Download the ESP32 USB driver at silabs.com. Go to the download section and download the driver for your operating system (Windows or Mac) to your PC. Unzip the file and select x64 or x32 installer depending on your PC. My computer is 64-bit so I installed x64 package. Follow the on screen tutorial and when done click finish.
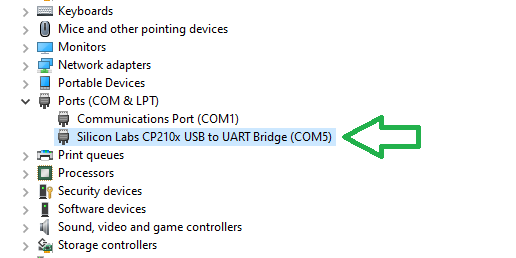
5. Now lets verify that the driver was installed successfully. Plug in your ESP32 board into your computer’s micro SD cable. Right click on your PC’s home button, select device manager and verify the components under Ports. You should see an item called Silicon Labs CP210x USB to UART Bridge as a port. The screen shot below illustrates the ESP32 board is connected to COM5.
Flash the ESP32 board with MicroPython
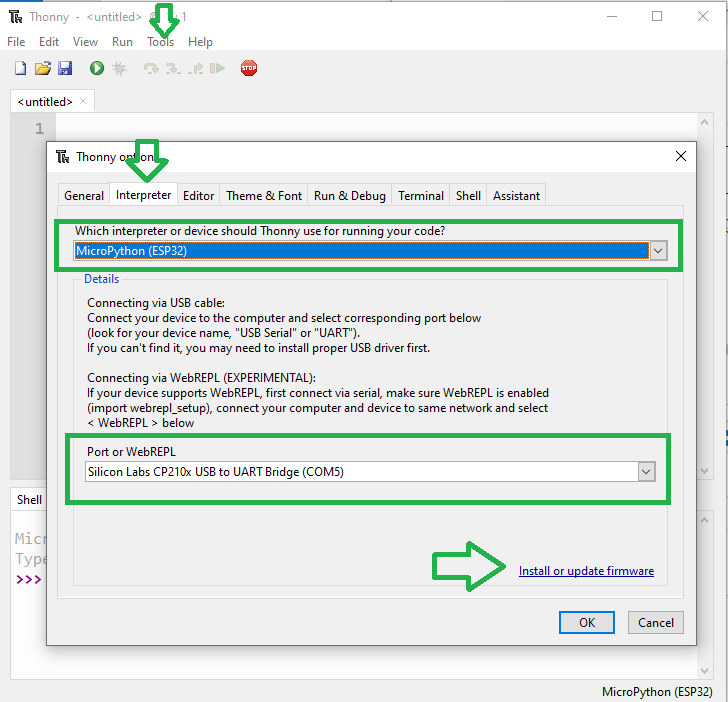
- Open the Thonny IDE and select Tools -> Interpreter.
- Select the interpreter to use drop down
- Choose MicroPython (ESP32)
- Then select the Port that you verified in the device manager. In the screen shot below it is COM5
- Finally select “install or update firmware”
2. When the dialog opens select the port and MircoPython file that you downloaded earlier.
3. Make sure the Erase flash before installing checkbox is selected.
4. Finally hold down the boot button on the ESP32 board and click install.
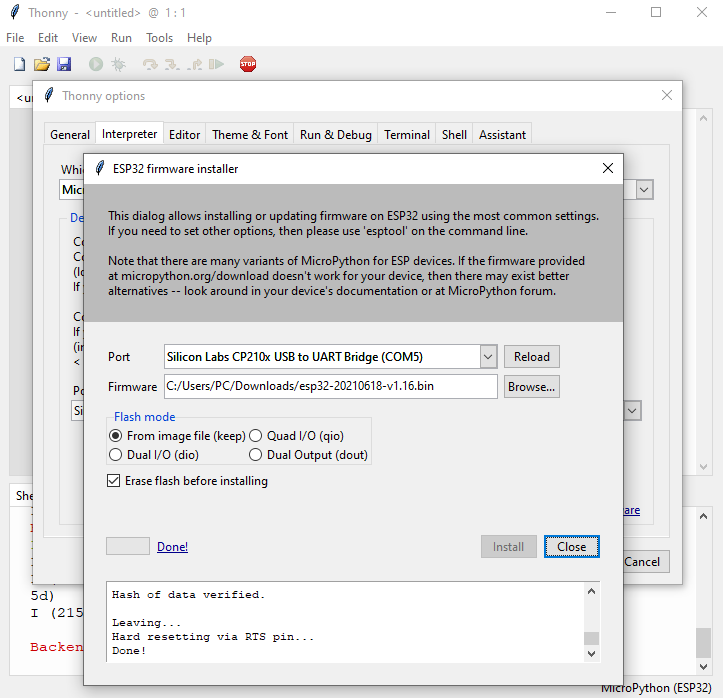
5. Click close to complete the process.
Write a sample program in Thonny
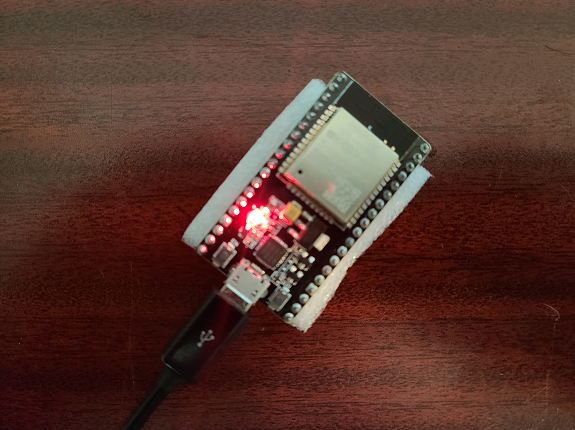
Now write a sample program in Thonny to confirm all software is installed correctly. The sample program we will write will turn the ESP32 board light on and off. Keep in mind the code is case sensitive. Plug in your board and the red power light should turn on.
- Write the code below in the Thonny IDE to turn the ESP32 blue board light on.
import machine
led = machine.Pin(2, machine.Pin.OUT)
led.on() 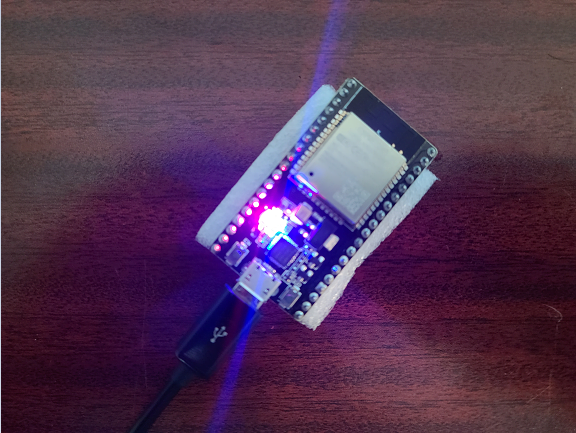
2. Write the code below in the Thonny IDE to turn the ESP32 blue board light off.
import machine
led = machine.Pin(2, machine.Pin.OUT)
led.off()
3. Copy the code below to make the ESP32 blue light blink. After the last statement in the while loop press enter two times to start the loop. Press ctrl c to interrupt the loop.
import machine
import time
while True:
     led.on()
     time.sleep(0.5)
     led.off()
     time.sleep(0.5)
How to erase the flash on an ESP32 board
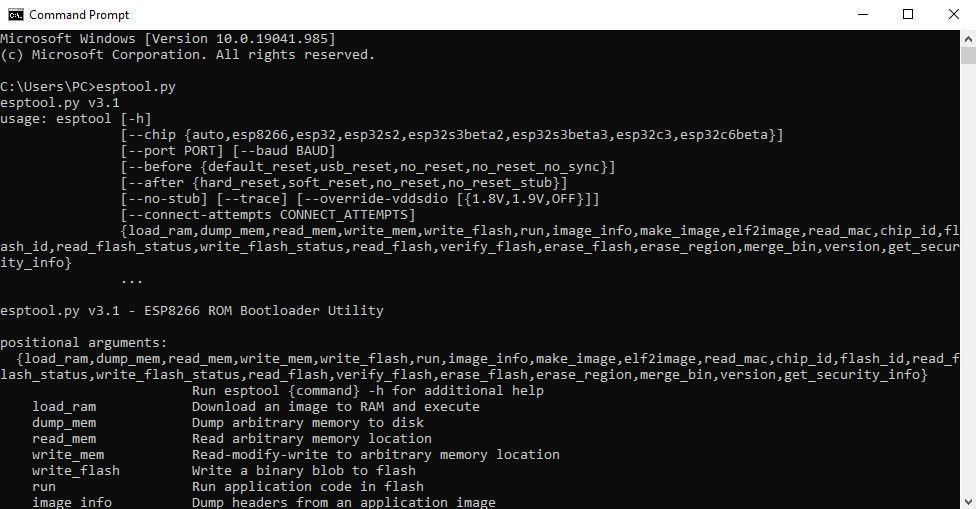
Run the command below in a terminal window to confirm the esptool is installed on your machine.
esptool.pyA menu of esptool items should display.
If the esptool menu does not display then run the esptool install command below.
pip install esptoolOnce you confirm that the esptool package is installed, by running esptool.py and viewing the menu above, you can begin the steps to erase the flash on an ESP32 chip. To erase the flash on the ESP32 board run the command below while holding the boot button on the board.
esptool.py --chip esp32 erase_flashAs soon as the process begins, you can remove your finger from the boot button. The esptool will automatically identify the port on which your ESP32 is located. If the erase process does not work your board was not in boot/flash mode and you will need to try again.
After completing this step you will need to reinstall the firmware on the ESP32 board. Follow the steps above to Flash the ESP32 board.
Next – Crypto currency prices in MicroPython on an ESP32 board

2 thoughts on “How to use MicroPython with a ESP32 board”