Connect your Ledger Nano or Trezor hardware wallet to MetaMask to manage your crypto currency. This setup will allow you to view, send, and confirm your Ledger or Trezor account transactions directly in the MetaMask screen. Your accounts will remain the same and funds do not need to be moved. This setup will allow you to interact with various websites through MetaMask while leaving your funds in your Ledger or Trezor hardware wallet accounts.
If you have a Ledger Nano or Trezor hardware wallet this process is important to consider. When interacting with Web3 dapps, yield farms, decentralized exchanges, etc. you can keep your funds safe on your hardware wallet. No need to transfer funds to your MetaMask account to interact with a Web3 website. Connect your hardware wallet to MetaMask so it can interact with Web3 websites.
Getting Started
To get started you will need:
- MetaMask installed in your browser
- A Ledger hardware wallet or a Trezor hardware wallet
For this tutorial we will explain how to connect a Ledger wallet to MetaMask. The process is the same to connect a Trezor wallet to MetaMask.
Connect a Hardware Wallet to MetaMask
To start connect your Ledger hardware wallet to your computer. Make sure it turns on and then input your pin.
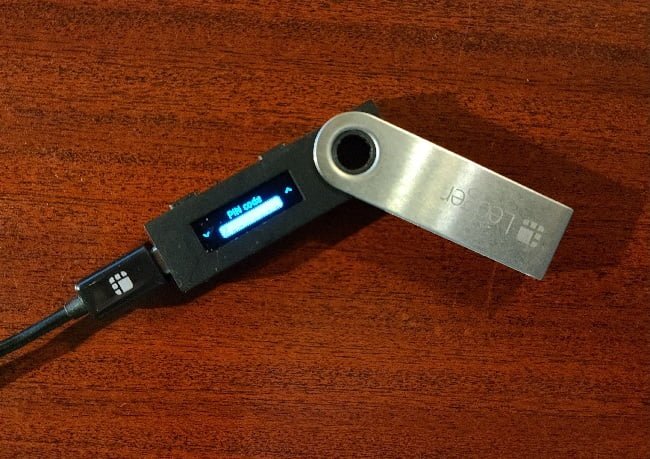
1. If you want to send ERC-20 tokens, you need to activate contract data on your device. Otherwise, invalid status 6a80 is returned.
- Using the navigation buttons scroll through the applications and select Ethereum and open the application.
- Once the Ethereum application is open scroll down and select settings. Once in settings select Contract Data then select Yes. You want to turn contract data on.
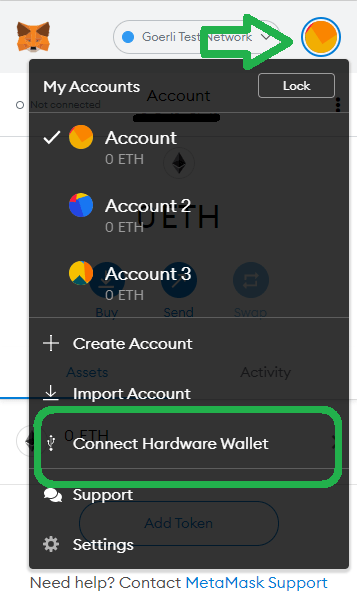
3. Now open MetaMask in your browser window.
4. Click on the avatar on the top right corner of MetaMask. This will display the menu in black below and will give you access to several options to customize your MetaMask wallet.
5. Next select connect hardware wallet. This option will allow you to connect your hardware wallet (Ledger or Trezor) to MetaMask.
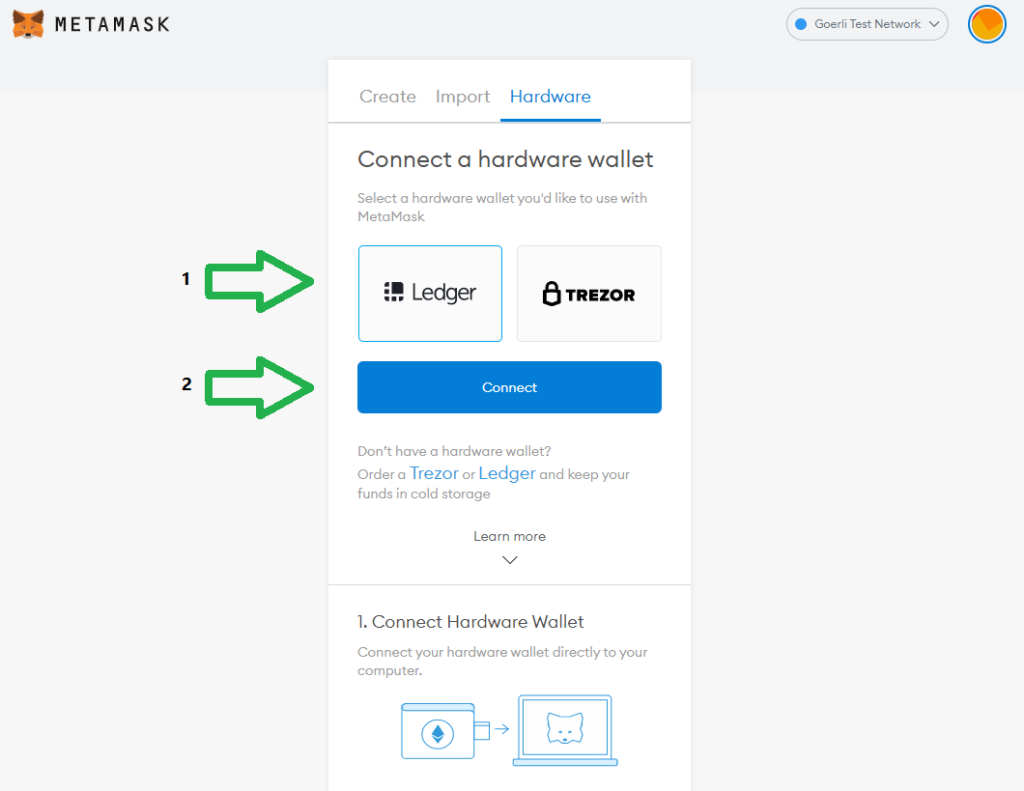
6. The screen below will display in your browser. Simply click on the hardware wallet you want to use and then click “CONNECT”.
7. Next you will be presented with a list of ETH addresses to choose from. If this is the first time you are setting up a wallet select the first address. If you already have an ETH address that you would like to connect to MetaMask select the address of choice.
MetaMask sorts the addresses on your Ledger by balance amount so it is easy to identify an account that contains funds.
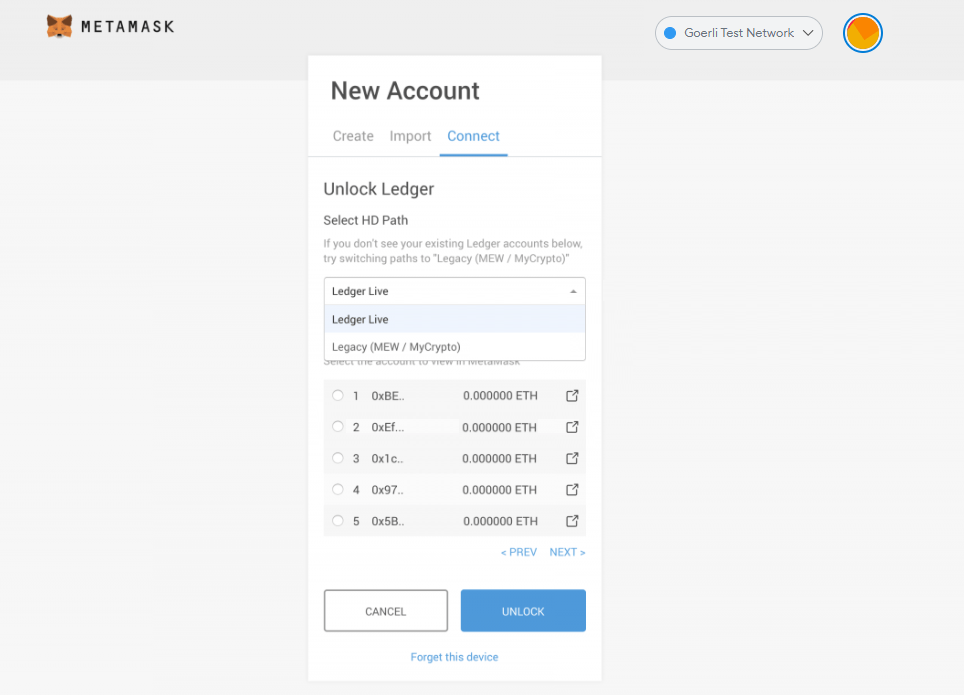
8. Once you have identified the account you want to interact with click unlock.
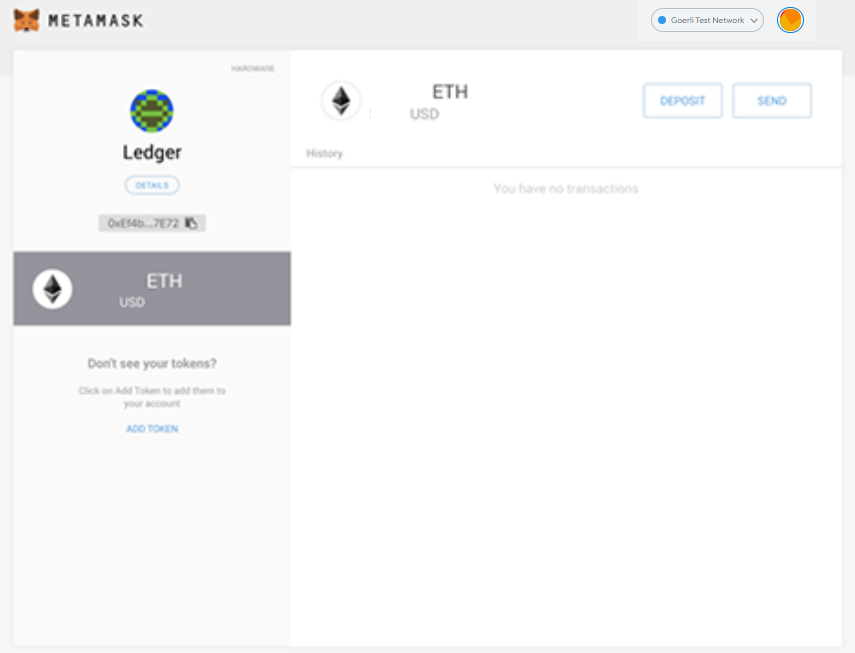
9. Finally the account screen will appear. This screen displays the following account information:
- Balance in ETH
- Balance in USD
- Transaction history
- All tokens in the account
- If you don’t see your tokens you can add then by selecting Add Token
- Deposit and Send tokens
Hardware Wallet using MetaMask on a Website
The process is the same as above when you use your hardware wallet on a Web3 website. When MataMask asks what account you would like to connect you can select your Ledger hardware wallet account.

If you perform a transaction on a Web3 website you will need to Approve the transaction on your Ledger hardware wallet. This is the same added security that occurs when you send funds using Ledger Live.
Next – Build a website with an Unstoppable Domain

3 thoughts on “Connect your hardware wallet to MetaMask”